
I always get excited when I make this Disneyland Peanut Butter Squares Recipe because it’s like bringing a little piece of that magical theme park right into my own kitchen. The combination of creamy peanut butter, crunchy graham crackers, and rich chocolate layers creates a nostalgic treat that’s both satisfying and indulgently sweet. Whenever I bite into these squares, I swear I can almost hear the joyful sounds of Disneyland, which just makes them taste even better!
Why You'll Love This Disneyland Peanut Butter Squares Recipe
One of the things I adore most about this Disneyland Peanut Butter Squares Recipe is its perfect balance of flavors and textures. The creamy peanut butter melds fantastically with the slightly crunchy graham cracker layers and the smooth, silky chocolate. The slight saltiness from the peanut butter and the buttery graham crackers elevates the sweetness just enough so each bite feels indulgent but not overwhelming. It’s a dessert that’s both comforting and exciting.
I also appreciate how surprisingly easy this recipe is to make. I don’t have to spend hours or deal with complicated techniques to get these perfect squares. It’s simply about layering and mixing, and the end result feels way more special than the effort it takes. I find that these squares are fantastic for all kinds of occasions—from casual get-togethers to festive holiday parties. They stand out on any dessert table, making people smile from the first look to the last crumb.
Ingredients You'll Need
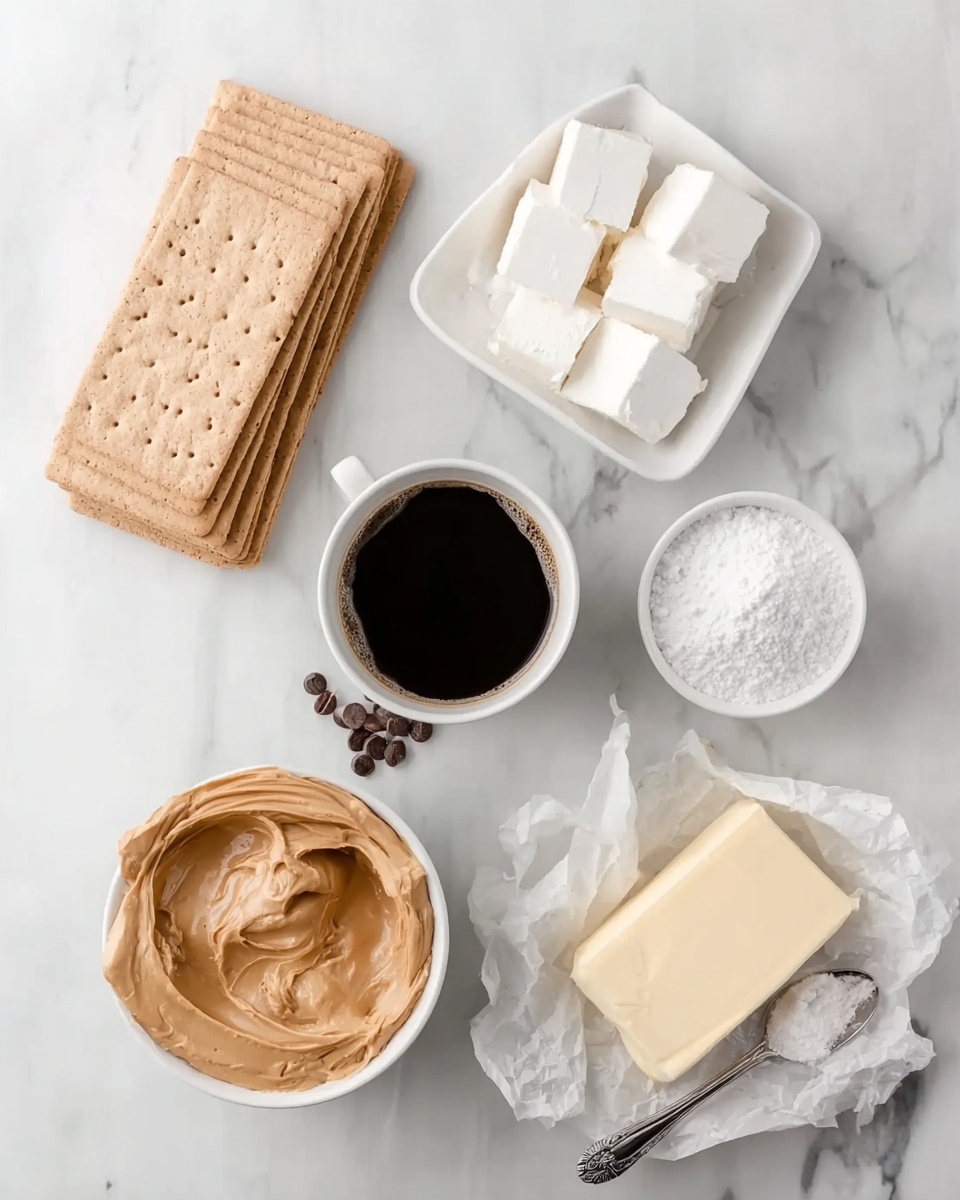
Before we dive in, let me tell you that the ingredients for this recipe are wonderfully straightforward but each one is crucial to nailing that classic Disneyland flavor, texture, and look. From the crisp graham crackers to the rich chocolate, everything plays a key role in making these squares truly magical.
- Graham cracker sheets: I use 14 whole sheets for that signature crunchy base and topping layers.
- Creamy peanut butter: It adds smoothness and rich nuttiness that’s essential for pulling everything together.
- Butter (softened): This helps create a luscious peanut butter filling with just the right level of richness.
- Vanilla extract: I always add vanilla to enhance and deepen all the flavors.
- Salt: Just a pinch balances the sweetness perfectly.
- Powdered sugar: It sweetens and thickens the peanut butter mixture for that classic texture.
- Shortening: I mix this with the chocolate chips for a smooth, glossy finish when melted.
- Semi-sweet chocolate chips: For that delicious chocolate layer that ties the whole recipe together.
Directions
Step 1: First, I spray a 9×13-inch glass baking dish with non-stick spray to make sure our squares come out cleanly.
Step 2: Next, I take 2 whole graham cracker sheets and place them in a Ziploc bag. Then I crush them into fine crumbs using a meat mallet or the bottom of a glass—this will be sprinkled on top later for the perfect crunch.
Step 3: Now I mix the peanut butter, softened butter, vanilla, and salt in a bowl until combined. Then, I slowly add the powdered sugar little by little, stirring continuously to get a thick, creamy peanut butter filling.
Step 4: While mixing, I prepare the chocolate layer by heating the semi-sweet chocolate chips and shortening in a microwave-safe bowl. I heat in 30-second bursts, stirring thoroughly each time until smooth, being careful not to burn it.
Step 5: I place 6 whole graham cracker sheets as a base layer in the baking dish. Then, I pour about one-third of the melted chocolate over the graham crackers in a thin, even layer.
Step 6: Using my hands, I grab fistfuls of the peanut butter mixture, flatten each, and carefully press them on top of the chocolate layer. It’s okay if the graham crackers break a little here, as long as the peanut butter covers most of the chocolate.
Step 7: I pour another third of the chocolate over the peanut butter layer, then add another 6 graham cracker sheets on top. After this, I pour the remaining chocolate evenly as the final chocolate layer.
Step 8: Last but not least, I sprinkle the crushed graham cracker crumbs evenly over the top for an extra bit of texture and a pretty finish. Then, I place the dish in the refrigerator to cool for at least 1 hour before cutting into squares.
Servings and Timing
This Disneyland Peanut Butter Squares Recipe yields about 24 delicious squares—that’s plenty for sharing or treating yourself over a few days. The prep time is about 15 minutes since most of this involves simple mixing and layering. The total chilling time in the refrigerator is at least 1 hour, so the overall total time comes to roughly 1 hour and 15 minutes. This resting time is essential to let the layers set and firm up for perfect slicing.
How to Serve This Disneyland Peanut Butter Squares Recipe
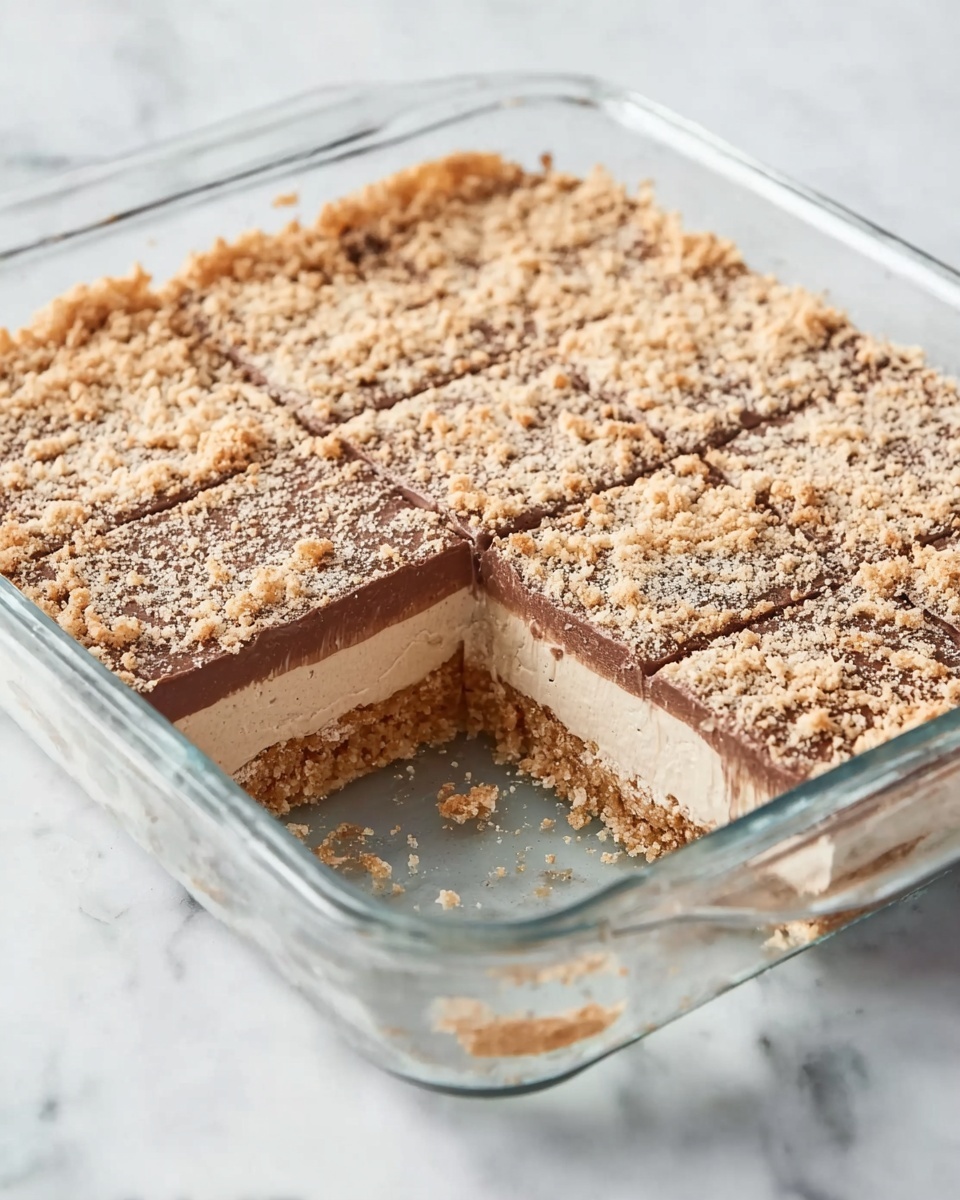
When I serve these peanut butter squares, I like to let them come to room temperature just a little before enjoying. That way, the chocolate is slightly softened, making each bite melt beautifully in your mouth. If I’m serving them at a party or family gathering, I cut them into bite-sized squares so people can indulge without feeling guilty—though full-sized squares are perfect for satisfying a serious sweet tooth.
These squares pair wonderfully with light accompaniments. I sometimes offer fresh berries or apple slices on the side to provide a fresh contrast to the rich, sweet flavors. If I want to dress them up for a holiday dessert platter, I’ll garnish the top with a light dusting of powdered sugar or a drizzle of white chocolate for a festive look.
As for drinks, I find they go perfectly with cold milk for a classic combo, or I enjoy pairing them with a creamy coffee or even a rich port wine when the occasion calls for something more elevated. These squares truly shine during cozy evenings at home, casual get-togethers, or as a nostalgic treat during Disneyland-themed parties.
Variations
I’ve had a lot of fun experimenting with variations on this Disneyland Peanut Butter Squares Recipe. For instance, swapping out the creamy peanut butter for natural peanut butter or even almond butter adds a different nuttiness and texture. If you’re avoiding dairy, softened coconut oil can replace butter and shortening, and vegan powdered sugar works just as well for a plant-based version.
Flavor-wise, I sometimes mix in a handful of chopped peanuts or pretzels into the peanut butter layer for extra crunch and a little salty surprise. For chocolate lovers, substituting semi-sweet chips with dark or milk chocolate can change the sweetness level to suit your taste. You could also try adding a layer of marshmallow fluff inside for extra gooeyness or lightly toasting the graham crackers for a deeper flavor.
If you want to get creative with the cooking method, I’ve even made individual portions by layering ingredients in small ramekins and chilling them for personal servings. This recipe is forgiving and versatile, so feel free to tweak it until it perfectly suits your cravings.
Storage and Reheating
Storing Leftovers
I usually store leftover peanut butter squares in an airtight container in the refrigerator to keep them fresh and firm. Properly stored, they stay delicious for up to 5 days. I recommend layering parchment or wax paper between pieces to prevent sticking and keep their neat shape intact.
Freezing
If I want to save them longer, these squares freeze beautifully. I wrap individual squares tightly in plastic wrap and place them in a freezer-safe container or zip-top bag. They keep well frozen for up to 2 months. When ready to enjoy, I thaw them overnight in the refrigerator for the best texture.
Reheating
Because these squares are best served chilled or at room temperature, I usually don’t heat them. If you prefer a slightly softer texture, you can leave a square out at room temperature for about 15–20 minutes before eating. Avoid microwaving, as it can melt the chocolate unevenly and make the peanut butter layer too gooey. Patience here really pays off!
FAQs
Can I use crunchy peanut butter instead of creamy?
Absolutely! Using crunchy peanut butter will add a nice texture contrast to the squares. Just keep in mind that the filling won’t be as smooth, but it adds a delightful crunch that many guests love.
Is there a gluten-free option for this recipe?
Yes! You can swap regular graham crackers for gluten-free graham crackers, which are widely available in most grocery stores. This simple substitution makes the recipe accessible for gluten-sensitive friends without sacrificing flavor.
Can I make this recipe ahead of time?
You definitely can. In fact, making it a day ahead allows the flavors to meld and the bars to set perfectly. Just keep them covered in the refrigerator until you're ready to serve.
What’s the best way to crush the graham crackers?
I find putting them in a sealed plastic bag and using a meat mallet works best for even crumbs without too much mess. You can also pulse them a few times in a food processor if you prefer a finer texture.
Can I substitute the shortening with something else in the chocolate layer?
You can try using coconut oil or butter instead of shortening, which will also help melt the chocolate smoothly. Just be mindful that these substitutes may slightly change the texture or flavor of the chocolate topping.
Conclusion
If you’re craving a sweet treat that captures the magic of the park and is simple enough to whip up whenever the mood strikes, I wholeheartedly recommend trying this Disneyland Peanut Butter Squares Recipe. It’s a nostalgic, crowd-pleasing dessert that brings joy with every bite, whether you’re sharing it with family, friends, or enjoying a cozy moment of indulgence solo. Give it a try—you might just find your new favorite homemade snack!
PrintDisneyland Peanut Butter Squares Recipe
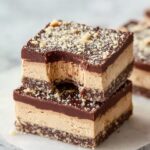
Experience the magic of Disneyland at home with these irresistible Peanut Butter Squares, featuring layers of graham crackers, creamy peanut butter filling, and rich chocolate topping, perfect for a delightful treat any time.
- Prep Time: 15 minutes
- Cook Time: 0 minutes
- Total Time: 1 hour 15 minutes
- Yield: 24 squares
- Category: Dessert
- Method: No-Cook
- Cuisine: American
Ingredients
Base and Filling
- 14 whole graham cracker sheets
- 2 cups creamy peanut butter
- 8 tablespoons butter, softened
- 2 teaspoons vanilla extract
- ½ teaspoon salt
- 3½ cups powdered sugar
Chocolate Topping
- 4 tablespoons shortening
- 4 cups semi-sweet chocolate chips
Instructions
- Prepare Baking Dish and Graham Cracker Crumbs: Spray a 9×13-inch glass baking dish with non-stick spray. Place 2 whole graham cracker sheets in a Ziploc bag and crush them into crumbs using a meat mallet or the bottom of a glass. Set aside.
- Make Peanut Butter Mixture: In a mixing bowl, combine the peanut butter, softened butter, vanilla extract, and salt. Gradually add the powdered sugar a little at a time, mixing well until fully incorporated and smooth.
- Melt Chocolate Mixture: In a microwave-safe bowl, combine the semi-sweet chocolate chips with shortening. Heat in 30-second intervals, stirring in between, until the mixture is smooth and fully melted. Be cautious not to overheat.
- Assemble First Layers: Lay 6 whole graham cracker sheets evenly in the bottom of the prepared baking dish. Pour about one-third of the melted chocolate over the graham crackers in a thin, even layer.
- Add Peanut Butter Layer: Using your hands, take fistfuls of the peanut butter mixture and flatten each piece. Carefully place these flattened pieces on top of the chocolate layer, covering as much surface as possible without breaking the graham crackers underneath. Use all of the peanut butter mixture.
- Layer Chocolate and Graham Crackers: Pour another one-third of the melted chocolate over the peanut butter layer. Then, add another layer of 6 whole graham cracker sheets on top, followed by the remaining melted chocolate poured evenly over the final cracker layer.
- Add Crumbled Topping and Chill: Sprinkle the crushed graham cracker crumbs evenly over the top chocolate layer. Place the baking dish in the refrigerator and let it cool for at least 1 hour to set.
- Cut and Serve: Once chilled and set, cut the dessert into squares of your preferred size and serve.
Notes
- For best results, use creamy peanut butter for a smooth texture.
- Ensure not to overheat the chocolate to avoid burning and clumping.
- Use a glass or ceramic dish instead of metal to prevent any metallic taste.
- You can store leftovers in the refrigerator in an airtight container for up to one week.
- Feel free to adjust the size of the squares to your liking.


Leave a Reply