
I am so excited to share my All-Butter Chickpea Flour Pie Crust (Gram Flour Pastry) Recipe with you because this crust is a game changer. From the first time I made it, I was hooked on the lovely nutty flavor and the tender crumb that chickpea flour brings to the table. This crust feels indulgent with the richness of real butter, yet it has a unique earthiness that only gram flour can give. I find it incredibly easy and rewarding to prepare, and with just a few simple ingredients, you get a homemade crust that feels special enough for celebrations or comforting enough for weeknight dinners. Whether you want to make a savory tart or a sweet pie, this crust is a versatile treasure in my kitchen.
Why You'll Love This All-Butter Chickpea Flour Pie Crust (Gram Flour Pastry) Recipe
When I first started experimenting with chickpea flour in pastries, I was pleasantly surprised by the depth of flavor it adds. This crust is subtly nutty and a little browned when baked, which enhances both sweet and savory fillings beautifully. I love how the all-butter aspect gives it a tender, flaky texture that melts in your mouth. It feels so rich without being heavy, and the gram flour keeps the crust light and crisp. You get the best of both worlds: a unique, wholesome flavor with buttery richness that pleasurably contrasts most fillings.
Besides the amazing flavor, what really draws me to this recipe is how straightforward it is. The dough comes together quickly if you use cold butter and chilled water, and I love that the chilling phase gives me flexibility—I can prepare the crust ahead of time and keep it ready until I'm set to bake. It's perfect for dinner parties when I want to impress with homemade pastry but without hours of fuss. Plus, the recipe’s simplicity means I can easily tweak it to suit the occasion, from casual family meals to holiday feasts. Honestly, this All-Butter Chickpea Flour Pie Crust (Gram Flour Pastry) Recipe has become my go-to foundation to make every pie a memorable dish.
Ingredients You'll Need

The ingredient list for this crust is wonderfully simple but each plays a crucial role. Chickpea flour gives the crust its distinctive flavor and wonderful crumb, while butter delivers that irresistible flakiness and depth. Salt enhances all the nuances, and a touch of organic cane sugar balances the savory notes nicely, especially if you’re aiming for a slightly sweet crust. Ice-cold water is essential for binding everything without melting the butter prematurely, ensuring the perfect consistency.
- Chickpea flour: This is the heart of the crust, providing a slightly nutty flavor and great texture unlike any traditional wheat crust.
- Salt: Just enough to enhance the natural flavors without overpowering the pastry.
- Organic cane sugar (optional): Adds a hint of sweetness that balances the savory notes perfectly if you desire a touch of sweetness.
- Butter: The secret to a flaky, tender crust — I always use cold, cubed, and even frozen butter for the best results.
- Ice water: Helps the dough come together while keeping the fat cold, which is essential for flakiness and ease of rolling.
Directions
Step 1: In a large bowl, whisk together the chickpea flour, salt, and organic cane sugar (if using). This ensures even distribution of the flavors before adding the butter.
Step 2: Add the frozen cubes of butter to the flour mixture. Using a food processor, pulse the butter into the flour until the mixture resembles coarse crumbs—about the size of peas or slightly larger. This chunkiness is what keeps the crust flaky later.
Step 3: Begin adding your ice-cold water one tablespoon at a time, pulsing the processor after each addition. Start with three tablespoons, then continue adding one tablespoon after another until the dough just holds together in a loose ball. Typically, this takes about 6 to 8 tablespoons, but be careful not to overwork it or make it too wet.
Step 4: Turn the dough out onto a lightly floured surface. Gently shape it into a single round disc, about 1 to 1 ½ inches thick. Wrap this disc tightly in plastic wrap to prevent drying.
Step 5: Chill the wrapped dough in the refrigerator for at least two hours. This resting period is crucial to allow the gluten to relax and the butter to firm up, giving you a more workable dough and crispier crust.
Step 6: When ready, unwrap the dough and place it on a floured surface. Sprinkle flour onto your rolling pin and hands to prevent sticking. Roll the dough out evenly into a circle approximately 12 inches in diameter and about ¼ inch thick. Take your time and turn the dough every few rolls to maintain even thickness and prevent sticking.
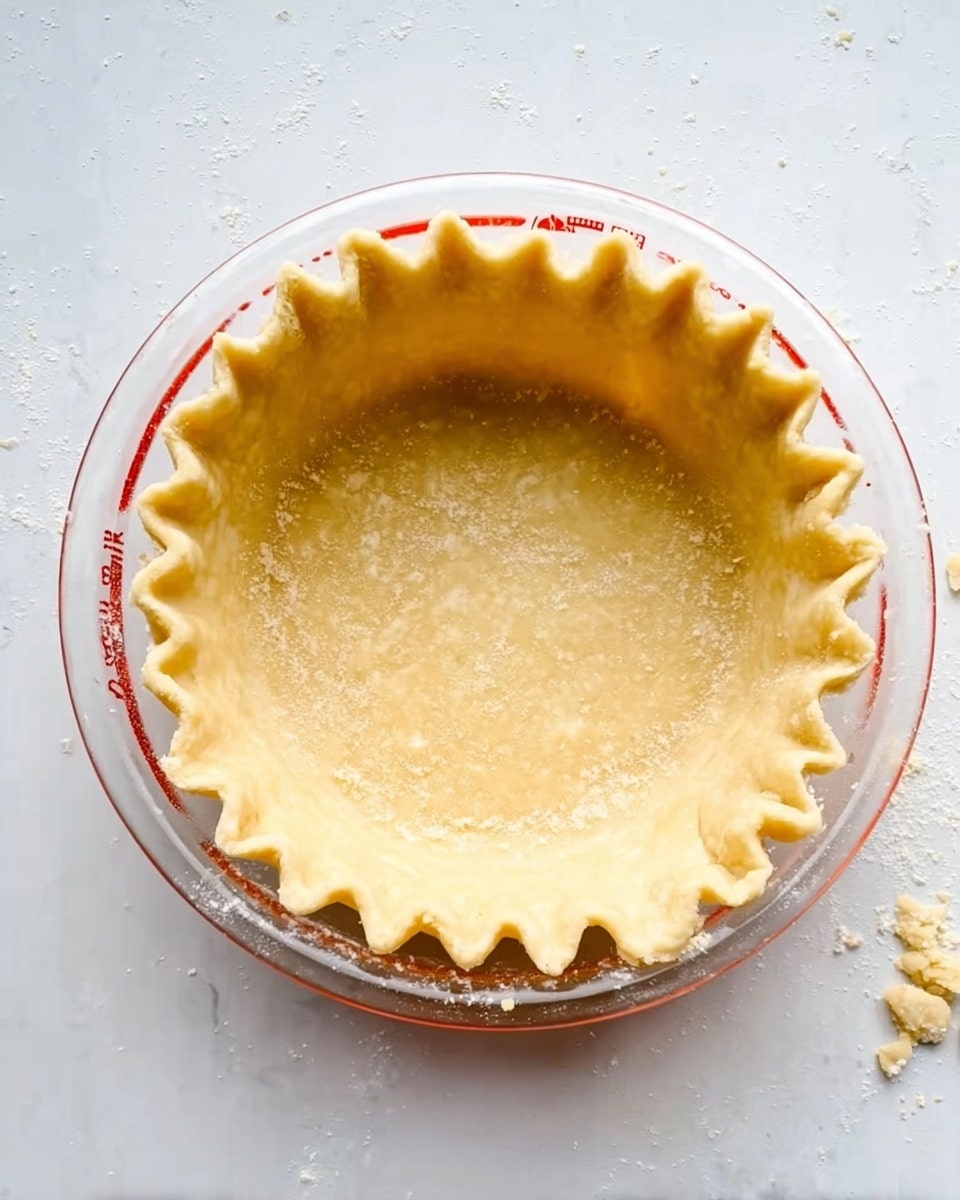
Step 7: Carefully transfer the rolled dough to a 9-inch pie dish by loosely rolling it around your rolling pin. Unroll the dough over the dish and gently press it into all the crevices and sides. Trim excess dough and use your fingers to flute or crimp the edges for a decorative finish.
Step 8: Follow your pie recipe’s baking instructions for blind baking or filling and baking as desired. This crust works wonderfully for both savory and sweet pies, so get creative!
Servings and Timing
This recipe makes enough dough for one 9-inch pie crust, serving approximately 6 to 8 people depending on the pie size and portion. Prep time takes around 20 to 30 minutes, and chilling the dough requires at least 2 hours to develop the perfect texture. Baking time varies based on your pie filling, but the crust itself typically needs about 15 to 20 minutes if blind baking. In total, from start to finish, plan for approximately 2 hours and 15 minutes, mostly hands-off chilling. This pace gives you time to prepare fillings or plan the rest of your meal while the dough chills.
How to Serve This All-Butter Chickpea Flour Pie Crust (Gram Flour Pastry) Recipe
Serving this versatile crust is one of my favorite parts. I love pairing it with a savory filling like caramelized onions and goat cheese or roasted veggies and fresh herbs—the nutty crust perfectly complements earthy flavors. For sweet pies, a classic lemon curd or tangy berry filling really shines because the crust offers just the right amount of buttery contrast without overpowering the fruit’s brightness. When plating, I recommend slicing generous wedges and serving warm or at room temperature for the best texture and flavor.
I like to garnish my pies with a light dusting of powdered sugar for sweet versions or a sprinkle of finely chopped herbs for savory. Presentation-wise, adding a side salad with fresh greens or a dollop of yogurt or crème fraîche pairs beautifully with the crust’s richness. For drinks, a crisp white wine like Sauvignon Blanc or a herbal iced tea complements the flavors wonderfully. This pie crust really shines at family dinners, brunches, or holiday gatherings where I want to impress guests with a homemade touch but still keep things approachable and delicious.
Because the crust holds up well both warm and at room temperature, I often serve leftovers the next day without reheating. It’s just as tasty and even easier to slice, so I find it’s perfect for make-ahead meals or casual get-togethers. You can plate it simply or dress it up with fresh fruit or savory garnishes depending on your mood and occasion.
Variations
If you want to experiment, I’ve found that swapping some of the chickpea flour for a gluten-free blend can work nicely without losing too much flavor, making this recipe perfect for gluten-sensitive friends. For a vegan take, trying cold coconut oil instead of butter can yield a slightly different but still deliciously flaky crust, though I personally prefer the richness that butter brings. Playing with add-ins like fresh herbs, ground spices, or citrus zest in the dough adds personality and can make your crust irresistible for specific recipes.
For texture lovers, using your hands to rub in the butter instead of a food processor creates a more rustic crust with larger butter pockets, which is wonderful for casual tarts and galettes. Alternatively, you can double the recipe and make smaller individual tart shells for a party—they bake faster and make for elegant, bite-sized treats. I always encourage some creativity here because this All-Butter Chickpea Flour Pie Crust (Gram Flour Pastry) Recipe is a fantastic foundation that invites personalization.
Storage and Reheating
Storing Leftovers
If you happen to have leftover unbaked dough, I wrap it tightly in plastic wrap and store it in an airtight container or resealable bag in the refrigerator. It keeps beautifully for up to three days before it starts to lose its ideal pliability. After baking, leftover pie slices should be stored in an airtight container in the fridge and enjoyed within 2 to 3 days to retain freshness and texture.
Freezing
This dough also freezes well, which is a lifesaver when I like to prep ahead. I tightly wrap the dough disc in plastic wrap followed by a layer of aluminum foil, then place it in a freezer bag. It keeps for up to 2 months when properly frozen. To thaw, I move it to the refrigerator overnight and let it rest at room temperature for 10 to 15 minutes before rolling out. Baked pies can also be frozen overnight, wrapped securely, but the crust may soften slightly upon reheating.
Reheating
To reheat leftover pie slices, I prefer warming them in a moderately preheated oven at 325°F (160°C) for 10 to 15 minutes. This method helps restore crispness to the crust without drying out the filling. Microwaving is less ideal because it can make the crust soggy and chewy, so I usually avoid that if I want the best texture. For frozen pies, thaw completely before reheating for even warming.
FAQs
Can I use regular all-purpose flour instead of chickpea flour?
You can, but the flavor and texture will be quite different. Chickpea flour gives this crust its signature nuttiness and slightly grainy texture that all-purpose flour can’t replicate. If you use all-purpose flour, the crust will be more traditional and less distinctive.
Is this crust suitable for gluten-free diets?
Yes! Chickpea flour is naturally gluten-free, making this crust a great option if you avoid gluten. Just double-check that your other ingredients and utensils are gluten-free certified to avoid contamination.
Why is it important to use cold butter and ice water?
Keeping the butter and water cold ensures the fat stays solid and distributed in chunks throughout the dough. This creates flaky layers when baked. If the butter melts before baking, your crust could turn dense and greasy instead of tender and flaky.
Can I make this dough ahead of time and freeze it?
Absolutely! This is one of my favorite ways to save time. Just freeze the dough wrapped tightly as directed. When you’re ready, thaw it in the fridge overnight and roll it out as usual. It bakes just as well as fresh dough.
What kind of pies work best with this crust?
This crust is wonderfully versatile. I love it with savory tarts like quiches, vegetable pies, or Indian-spiced fillings. It also pairs perfectly with sweet pies like lemon meringue, berry, or apple pies. The nutty flavor enhances both sweet and savory fillings beautifully.
Conclusion
I hope you are as excited to try this All-Butter Chickpea Flour Pie Crust (Gram Flour Pastry) Recipe as I am to share it with you. It has quickly become a staple in my baking lineup because it strikes the perfect balance between unique flavor, flaky texture, and ease of preparation. Once you make it, I bet you’ll find yourself reaching for this recipe time and time again whenever you want your pies and tarts to stand out. Happy baking!
PrintAll-Butter Chickpea Flour Pie Crust (Gram Flour Pastry) Recipe

This All Butter Chickpea Flour Pie Crust is a gluten-free, savory pastry option made with chickpea (gram) flour and cold butter. The crust offers a tender, flaky texture perfect for both sweet and savory pies and is naturally rich in protein and flavor. It requires chilling and careful rolling to achieve the ideal dough consistency and is baked as a traditional pie crust.
- Prep Time: 20 minutes
- Cook Time: 15 minutes (blind baking only, depending on final recipe)
- Total Time: 2 hours 35 minutes (including chilling time)
- Yield: One 9-inch pie crust
- Category: Pie Crust
- Method: Baking
- Cuisine: Gluten Free
- Diet: Gluten Free
Ingredients
Dry Ingredients
- 1 ½ cups chickpea flour (Bob's Red Mill recommended)
- ½ teaspoon salt
- ½ tablespoon organic cane sugar (optional)
Wet Ingredients
- 1 stick (8 tablespoons) cold butter, cut into cubes and frozen
- ½ cup iced water (you will use approximately 6-8 tablespoons)
Instructions
- Make the flour mixture: Place chickpea flour, salt, and optional natural cane sugar into a bowl and whisk thoroughly to combine all dry ingredients evenly.
- Cut butter into chickpea flour: Add the cold butter cubes to a food processor with the flour mixture and pulse repeatedly until the texture resembles coarse crumbs about the size of peas.
- Add iced water: Using a tablespoon, add iced water in small increments starting with three tablespoons, pulsing after each addition. Continue adding water tablespoon by tablespoon until the dough starts to come together in a ball, which usually takes 6 to 8 tablespoons.
- Form the dough disc: Transfer the crumbly dough onto a floured surface. Gently shape it into a single round disc. Wrap tightly in plastic wrap and chill in the refrigerator for a minimum of two hours or up to a couple of days for best results.
- Roll out the dough: Remove the dough disc from the fridge and discard plastic wrap. Place it on a floured work surface and dust rolling pin and hands with flour. Roll out the dough evenly and carefully, turning occasionally and adding more flour if the dough sticks, until it reaches about ¼-inch thickness and at least 12 inches in diameter.
- Transfer dough to pie dish: Gently roll the dough around the rolling pin and unroll it into a 9-inch pie dish. Press it to fit the dish, trimming excess dough and folding edges inward. Crimp or flute the edges using your fingers to create an attractive finish.
- Bake the pie crust: Bake according to your specific pie recipe instructions, typically baked blind if using for a filled pie, or with filling directly if appropriate.
Notes
- Keeping the butter and water cold is crucial for a flaky crust.
- Chilling the dough helps relax gluten and makes rolling easier.
- Use a food processor for mixing to achieve the ideal crumbly texture quickly.
- You can blind bake this crust if your pie recipe requires a pre-baked crust.
- This crust is naturally gluten free and works well for savory or sweet pies.


Leave a Reply