
I absolutely love making bread at home, and this Crusty, Open-Crumb Baguettes Recipe has become one of my all-time favorites. The texture is incredible, with a shatteringly crisp crust paired with a beautiful, open crumb that feels light and airy inside. Using just four simple ingredients and a little patience, I can create bakery-quality baguettes that impress everyone. It’s a rewarding process that fills my kitchen with that irresistible fresh-bread aroma, and happily, it’s also vegan, making it perfect for all kinds of dietary preferences.
Why You'll Love This Crusty, Open-Crumb Baguettes Recipe
What excites me most about this recipe is the flavor and texture it delivers. The crust is perfectly crisp and crackly, providing that satisfying crunch every time you bite into it, while the open crumb makes the inside soft and tender with those lovely holes characteristic of an artisan baguette. The hint of salt and subtle wheat flavor come through beautifully, thanks to the long fermenting times that develop complexity in the dough without any fuss.
From my experience, the ease of preparation is another big plus. Since this is a no-knead dough, I don’t have to spend ages working it; instead, I let time do the hard work. The process fits beautifully into a busy schedule because the initial rise can happen overnight or over several hours, and the dough only needs minimal handling when it’s time to shape the baguettes. Whether I’m preparing for a casual weekend brunch or a more formal dinner, these baguettes consistently elevate the meal, making them a standout on any table.
Ingredients You'll Need
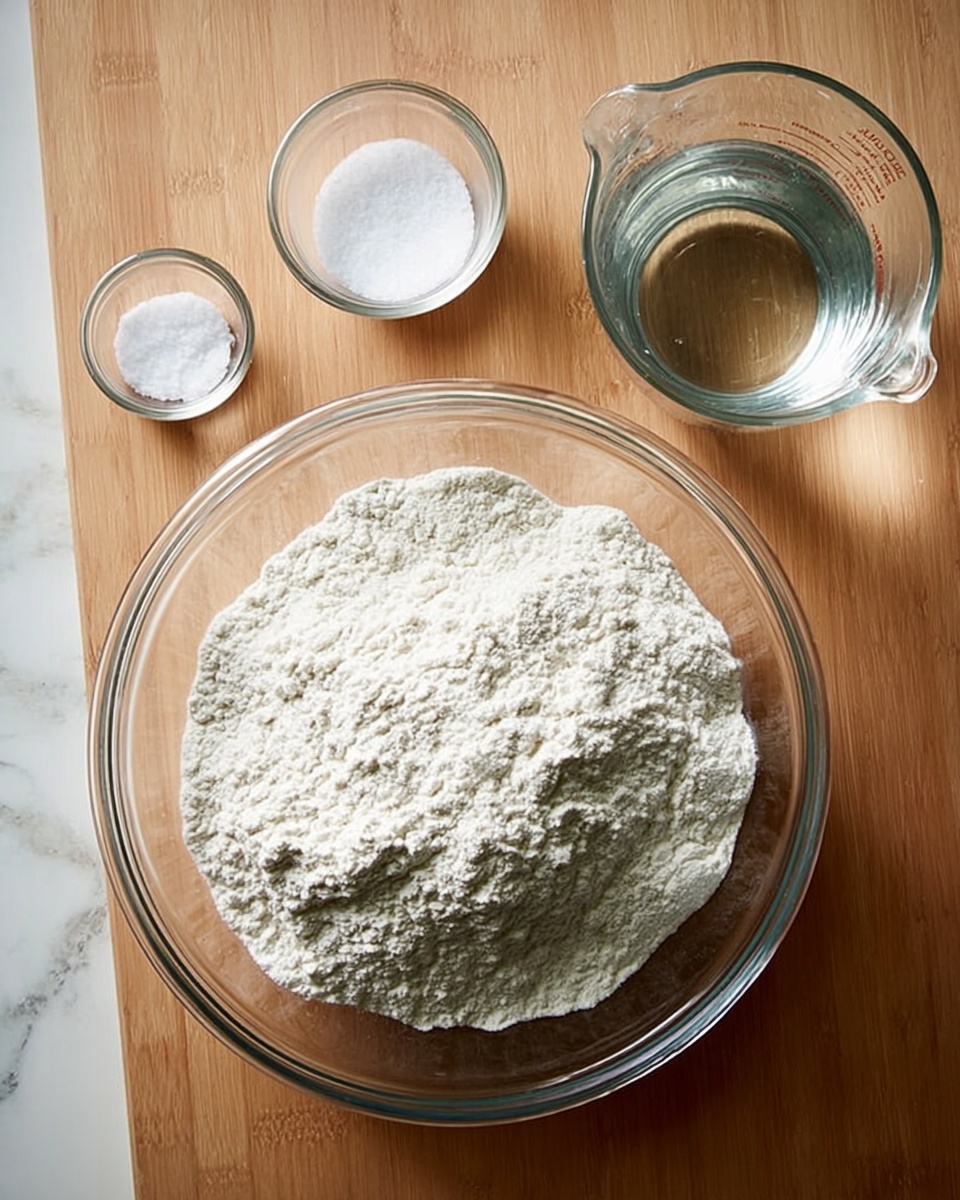
The beauty of this Crusty, Open-Crumb Baguettes Recipe lies in its simplicity — just a handful of ingredients that come together to build incredible flavor, texture, and that natural golden crust. Using a high-quality bread flour sets the stage for the open crumb, while the precise amount of salt enhances taste without overpowering. Instant yeast keeps things convenient without sacrificing rise, and cold water helps develop the dough’s structure during the long ferment.
- Bread flour (550 grams): This is the backbone for the perfect crumb and chew, and using high-protein flour really helps get that open texture.
- Salt (15 to 16 grams): Salt balances flavor and strengthens the dough, so measuring it accurately enhances the taste and fermentation.
- Instant yeast (2 grams): I love using instant yeast for its ease and reliability, ensuring a great rise without extra steps.
- Cold water (385 grams): The temperature of the water slows fermentation, allowing flavor to fully develop over time.
- Extra-virgin olive oil (small amount): Brushed over the dough before rising to keep it moist and add a subtle richness.
Directions
Step 1: In a large bowl, whisk together the flour, salt, and yeast until well combined. Pour in the cold water and mix with a spatula until the dough forms a shaggy ball. If the dough seems too dry, gently knead it in the bowl until it comes together. Cover with a towel and let it rest for 15 to 30 minutes.
Step 2: Dip one hand in a bowl of water and use it to stretch and fold the dough by grabbing an edge and folding it toward the center. Repeat this 8 to 10 times, turning the bowl 90 degrees after every few folds. You’ll notice the dough becoming smoother and more cohesive.
Step 3: Drizzle about 1 teaspoon of extra-virgin olive oil over the dough and rub it around using your hands to coat evenly. Cover the bowl tightly and leave the dough to rise at room temperature until it has nearly doubled, which usually takes 6 to 10 hours depending on your kitchen temperature and season.
Step 4: Turn the dough onto a lightly floured surface and divide it into 4 equal portions weighing about 237 grams each. Shape each into a tight ball by pulling edges under and dragging gently to create tension on the surface. Place each ball into an airtight container and refrigerate for 1 to 3 days, which helps deepen the flavor.
Step 5: On baking day, remove the dough balls you want to use and let them rest at room temperature. Lightly dust your work surface with flour if needed, then pat each ball into a rectangle. Fold and pinch the dough envelope-style, roll into a log, and place seam side down in a floured proofing container or baking pan. Cover and allow the dough to proof for 2.5 to 3 hours until it slowly springs back when poked.
Step 6: While proofing, preheat your oven and baking vessel of choice (Challenger Bread Baker, Baking Steel, or Emile Henry Baguette Baker) to 450ºF. This takes about 30 minutes and ensures a hot environment for perfect oven spring.
Step 7: Carefully transfer your scored dough onto parchment paper and place inside your preheated vessel. Score the top with 3 diagonal slashes using a sharp blade to allow proper expansion during baking.
Step 8: Bake covered for 10 minutes to trap steam, then uncover and bake for another 10 minutes or until golden brown and crusty. The smell will be intoxicating and the crust delightfully crackly.
Step 9: Remove the baguettes from the oven and cool on a wire rack for about 20 minutes before slicing and serving to let the crumb set perfectly.
Servings and Timing
This recipe yields 4 baguettes, perfect for sharing with family or friends. Prep time includes mixing and folding which takes about 20 minutes. The bulk fermentation lasts 6 to 10 hours at room temperature, followed by refrigeration for 1 to 3 days (optional for flavor development). On baking day, shaping and proofing take approximately 3 hours, and baking itself is 20 minutes. Including cooling, total time spans roughly 48 hours and 20 minutes if you use the slow ferment method, but the active hands-on time is much shorter.
How to Serve This Crusty, Open-Crumb Baguettes Recipe

When I serve these baguettes, I love slicing them while they’re still slightly warm so the crumb melts just a little with butter or olive oil drizzled on top. They make an ideal accompaniment to hearty soups, fresh salads, or a simple cheese platter. For a rustic dinner, I often pair them with ratatouille or a flavorful stew, using the bread to soak up every delicious bite.
Presentation-wise, a few sprigs of fresh herbs or a sprinkle of flaky sea salt over the crust elevates the visual appeal and adds extra flavor. I sometimes serve these on wooden boards to enhance the casual, artisan vibe. For beverages, I adore pairing crispy baguettes with a chilled glass of Sauvignon Blanc or a light, fruity rosé, but they’re just as great with an artisanal craft beer or sparkling water with lemon.
This Crusty, Open-Crumb Baguettes Recipe shines at gatherings—whether it’s a holiday spread, weekend brunch, or cozy weeknight meal. I recommend serving them warm or at room temperature to showcase the contrasting crust and crumb textures. Plus, offering smaller slices encourages sharing and tasting alongside a variety of toppings.
Variations
I like experimenting with this recipe to keep things interesting. If you want to add a little depth, substituting part of the flour with whole wheat or spelt flour can introduce a nutty flavor while maintaining that open crumb. For an extra flavor lift, adding a tablespoon of herbs like rosemary or thyme to the dough works beautifully. Just be sure not to overdo it, so the classic baguette flavor still shines through.
If you’re gluten-free, this recipe is more challenging, but I’ve had success adapting it with a blend of gluten-free bread flours and adding xanthan gum for structure. Using a no-knead approach with gluten-free dough can be tricky because it behaves differently, so patience and some trial runs are key. For vegan adjustments, this recipe is perfectly suited as-is, since it contains no animal products.
When it comes to cooking methods, I love trying different baking vessels. The Emile Henry lidded baguette baker traps steam beautifully, while using a baking steel with a makeshift steam tray provides a wonderfully crispy crust. I also sometimes bake directly on a preheated baking stone if I don’t have specialized tools. Each gives a slightly different crust profile but consistently great results.
Storage and Reheating
Storing Leftovers
If you have leftovers, I recommend storing your baguettes in a ziplock bag at room temperature for up to three days. Avoid refrigerating bread as it can dry out and lose that crisp crust. Keeping them sealed helps maintain moisture, but inevitably, the crust softens a bit after the first day.
Freezing
Freezing is a fantastic option to preserve your baguettes longer. Wrap them tightly in plastic wrap, then place them inside a freezer bag or airtight container. Properly stored, they keep well for up to three months. When you’re ready to enjoy, thaw them on the counter for a few hours before reheating.
Reheating
To bring your baguettes back to life, preheat your oven to 350ºF. Remove the bread from any plastic wrapping, wrap it loosely in foil if you want to retain some moisture, and bake for about 15 minutes. For a crispier crust, remove the foil during the last 5 minutes. Avoid microwaving since it tends to make bread rubbery and soggy. This simple reheating method revives that crunchy crust and soft, open crumb beautifully.
FAQs
Can I make this crusty baguette recipe without refrigeration?
Yes! While refrigerating the dough helps develop deeper flavor and improves texture, you can ferment and proof entirely at room temperature by adjusting timing. Just expect a slightly different flavor profile and be prepared to handle the dough sooner during shaping and baking.
What if my dough feels too sticky to shape?
It’s common for high-hydration doughs to be sticky. Lightly flour your hands and work surface, but avoid adding too much flour, as it can affect the crumb. Wetting one hand with water when handling the dough, as suggested in the stretch and fold step, also helps keep stickiness manageable without toughening the dough.
How do I know when the baguette dough has properly proofed?
The “poke test” is reliable: gently press your finger into the dough; it should slowly spring back without completely bouncing back immediately. If the indentation stays or the dough deflates, it may be over-proofed. Proper proofing is key for that open crumb and good oven spring!
What kind of flour works best for this Crusty, Open-Crumb Baguettes Recipe?
I usually use King Arthur bread flour for consistent results. However, I’ve had fantastic, even more open crumb when using Petra 0102 flour, which is partially sprouted wheat. All-purpose flour can work in a pinch but might yield slightly less structure and chew.
Can I use active dry yeast instead of instant yeast?
You can, though instant yeast is preferred because it blends directly into dry ingredients and rises more predictably. If using active dry yeast, dissolve it in warm water first and adjust rising times accordingly. Keep in mind that rising times may be longer to achieve the same results.
Conclusion
If you’re craving baguettes that are delightfully crusty on the outside and perfectly open and airy inside, I wholeheartedly recommend giving this Crusty, Open-Crumb Baguettes Recipe a try. It’s approachable, uses simple ingredients, and rewards your patience with the kind of bread you’ll be excited to show off. From casual lunches to special occasions, these baguettes truly bring a slice of artisanal bakery magic to your kitchen. I can’t wait for you to experience that first crackling bite—you’re going to love it!
PrintCrusty, Open-Crumb Baguettes Recipe

This recipe for Crusty, Open-Crumb Baguettes delivers beautifully light and airy bread with a golden, shatteringly crisp crust. Using a simple no-knead dough made from just four ingredients, the secret to success lies in allowing a long, slow fermentation and baking the bread in a steamy environment to enhance crust and crumb texture. Detailed step-by-step instructions guide you through mixing, stretching and folding, shaping, proofing, and baking using versatile tools such as a Challenger Bread Baker, Baking Steel, or Emile Henry Baguette Baker.
- Prep Time: 20 minutes
- Cook Time: 20 minutes
- Total Time: 48 hours 20 minutes (including slow fermentation and optional refrigeration)
- Yield: 4 baguettes
- Category: Bread
- Method: Baking
- Cuisine: French
- Diet: Vegan
Ingredients
Dough
- 550 grams (about 4¼ cups) bread flour or all-purpose flour, plus more for dusting
- 15 to 16 grams salt (see notes for salt type and measurement)
- 2 grams (about ½ teaspoon) instant yeast (SAF instant yeast recommended)
- 385 grams (about 1 ⅔ cups) cold water (about 60°F)
Additional
- Extra-virgin olive oil (about 1 teaspoon for coating the dough)
- Flour for dusting work surfaces
Instructions
- Mix the dough: In a large bowl, whisk together the flour, salt, and instant yeast. Add the cold water and use a spatula to mix until a shaggy dough ball forms. If the dough seems dry, gently knead it by hand in the bowl until it comes together. Cover with a towel and rest for 15 to 30 minutes.
- Stretch and fold: Fill a small bowl with water. Dip one hand into the water, use the dry hand to stabilize the bowl, then grab an edge of the dough with the wet hand, pull it up and fold it toward the center. Repeat 8 to 10 times, turning the bowl 90 degrees between sets. This transforms the dough from shaggy to smooth and cohesive.
- Oil and rise: Pour about 1 teaspoon of extra-virgin olive oil over the dough and rub it evenly with your hands. Cover the bowl tightly and let the dough rise at room temperature until nearly doubled in size, approximately 6 to 10 hours depending on warmth.
- Portion the dough: Turn the dough out onto a lightly floured surface. Use a bench scraper to divide into four equal portions (~237 grams each). Form each into a tight ball by folding edges inward and dragging the dough to create surface tension.
- Store the dough: Place dough balls in individual airtight containers and refrigerate for 1 to 3 days for slow fermentation (optional but recommended for flavor and open crumb).
- Shape and proof: On baking day, remove dough from fridge. Lightly flour a surface as needed. Pat each dough ball into a 6×7 inch rectangle, then fold top down toward center and pinch gently, rotate 180º and repeat several folds creating an “envelope.” Roll the log tightly and pinch the seam closed. Place seam-side down in a floured DoughMate or baking pan inside a sealed bag. Let proof for 2.5 to 3 hours at room temperature until the dough passes the poke test (slowly springs back).
- Prepare baking vessel: Depending on equipment: preheat oven to 450ºF for 30 minutes with Challenger Bread Baker or Baking Steel inside. Butter the Emile Henry Baguette Baker but do not preheat it.
- Score the dough: Gently roll the dough log to release it. Transfer it to parchment paper if using Challenger or Baking Steel. Using a sharp blade, make three diagonal slashes evenly spaced along the top. If using Emile Henry baker, score dough inside the buttered vessel.
- Bake the baguette: For Challenger Bread Baker: Place dough on parchment in pan, cover, bake covered 10 minutes, uncover and bake 10 more minutes until golden brown. For Baking Steel: Slide dough on parchment onto steel, cover with aluminum pan weighted with a heavy skillet, bake 10 minutes covered, then 10 minutes uncovered. For Emile Henry Baker: Cover and bake 10 minutes, uncover and bake 10 minutes more to golden perfection.
- Cool: Remove baguettes from oven and cool for about 20 minutes before serving to allow crumb to set.
- Storage: Best eaten same day. To store, place in a ziplock bag at room temperature up to 3 days or freeze up to 3 months. Reheat at 350ºF for around 15 minutes for fresh crust.
Notes
- Use a scale for precise measurement of ingredients, especially flour and salt.
- Preferred flour: King Arthur Bread flour or Petra 0102 (partially sprouted wheat) for an even more open crumb.
- Salt: Diamond Crystal kosher salt preferred; if using fine sea salt or Morton kosher salt, adjust quantity accordingly to 2.5 teaspoons vs 5 teaspoons for Diamond Crystal.
- Yeast: SAF instant yeast recommended for best results.
- Long, slow fermentation (6-10 hours) improves flavor and texture and can be extended with refrigeration.
- Watch video tutorials (if available) before shaping to master technique.
- Baking tools options include Challenger Bread Baker, Baking Steel with improvised steaming setup, or Emile Henry Lidded Baguette Baker.
- Use water to wet one hand during stretch and fold to handle dough more easily without sticking.
- Scoring is critical for oven spring and creating the classic baguette look.


Leave a Reply