
I absolutely adore this Chocolate Mousse Cake Recipe because it combines rich, velvety chocolate mousse with a crunchy Oreo crust, creating a perfectly balanced dessert that feels both indulgent and light. Every time I make it, I'm amazed at how approachable it is—even though it looks like a professional bakery treat, it requires no baking and only a handful of simple ingredients. If you are a chocolate lover like me, this cake will quickly become one of your all-time favorites!
Why You'll Love This Chocolate Mousse Cake Recipe
What makes this Chocolate Mousse Cake Recipe truly special, in my opinion, is the incredible depth of flavor it delivers. The semisweet chocolate gives a wonderful bittersweet note that contrasts beautifully with the creamy, airy mousse, and all that sits on top of a buttery Oreo crust that adds texture and just the right amount of crunch. I love that it never feels too heavy; it melts in your mouth and keeps you coming back for another slice without feeling overwhelmed.
Another reason I keep coming back to this recipe is how easy it is to prepare, despite its fancy appearance. You don’t need to turn on an oven, and the steps are mostly about mixing and chilling. This makes it perfect for when I want to wow guests but also enjoy the process without stressing out. Plus, it’s a fantastic dessert for holidays, birthdays, or any celebration where you want to bring something memorable and delicious without spending hours in the kitchen. I truly believe this cake stands out because of its simple elegance and the way it pleases chocolate fans of all ages.
Ingredients You'll Need
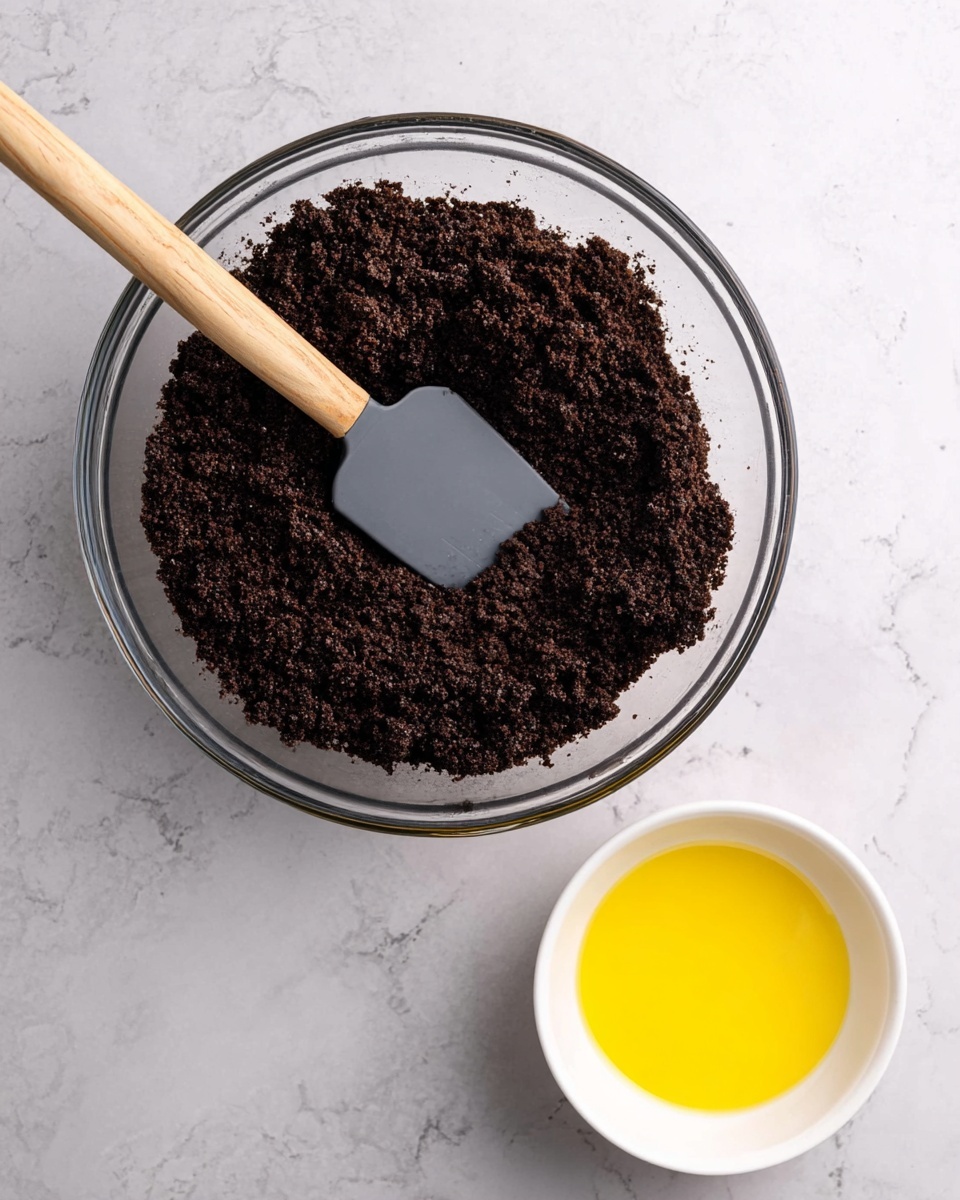
These ingredients are straightforward but essential for getting the perfect balance of texture and luscious chocolate flavor in your cake. From the crunchy Oreo crust to the smooth mousse and fluffy whipped cream topping, each plays a key role in layering flavors that delight every bite.
- Oreo cookies: I use finely crushed cookies to create a sturdy, flavorful crust that adds the perfect crunch.
- Unsalted butter: Melted and combined with the crushed Oreos to bind the crust firmly.
- Semisweet chocolate: Chopped for melting, it provides the rich, slightly bitter chocolate base for the mousse.
- Vanilla extract: Just a hint to deepen and enhance the chocolate flavor.
- Salt: A small pinch that balances sweetness and enhances all the flavors.
- Heavy cream: Divided between the mousse and the whipped topping, it adds silkiness and lightness.
- Granulated sugar: Used in the whipped cream for decoration, it adds subtle sweetness and helps the cream hold its shape.
- Chocolate shavings and Oreo halves: For garnishing — I love how these look and add extra texture and flavor to the presentation.
Directions
Step 1: Grease a 9-inch springform pan with butter to make sure the cake releases easily after chilling.
Step 2: Combine the finely crushed Oreo cookies with the melted butter until the mixture holds together like wet sand. Press this firmly into the bottom of the pan using the bottom of a flat measuring cup or glass to create a compact crust. Chill in the refrigerator for 30 minutes to set.
Step 3: While the crust chills, place the chopped semisweet chocolate into a medium bowl along with vanilla extract and a pinch of salt.
Step 4: Heat ¾ cup of heavy cream in a small saucepan over medium heat just until it reaches a bare simmer—do not let it boil. Immediately pour the hot cream over the chocolate, cover the bowl, and let it sit undisturbed for 1 minute to allow the chocolate to melt gently.
Step 5: After a minute, whisk the mixture until smooth and glossy to create a chocolate ganache. Cover it and chill in the fridge for about 20 minutes until it’s cool but still pliable.
Step 6: In a clean medium bowl, beat 1 ½ cups heavy cream on medium-high speed using a hand or stand mixer until soft peaks form—this takes about 2 minutes. Fold the cooled chocolate mixture carefully into the whipped cream using a silicone spatula until fully combined and no streaks remain.
Step 7: Pour the luscious chocolate mousse over the chilled Oreo crust and spread it gently to the edges of the pan. Cover the cake with plastic wrap and refrigerate for at least 6 hours or overnight to let it fully set and develop flavor.
Step 8: Just before serving, take the remaining ¾ cup heavy cream and 2 tablespoons granulated sugar and beat until stiff peaks form. Pipe this whipped cream around the edges using a large open star tip for a beautiful finish.
Step 9: Garnish your cake with Oreo cookie halves and chocolate shavings for an elegant touch. Keep the cake refrigerated at all times until ready to serve.
Servings and Timing
This Chocolate Mousse Cake Recipe yields about 12 generous servings—perfect for sharing with family and friends. The active prep time is around 30 minutes, which is so manageable for such a stunning dessert. Since the mousse needs to chill and set, plan for at least 6 hours of refrigeration or better yet, prepare it the day before to allow flavors to fully develop. Overall, the total time before you get to indulge is about 6 hours and 30 minutes.
How to Serve This Chocolate Mousse Cake Recipe
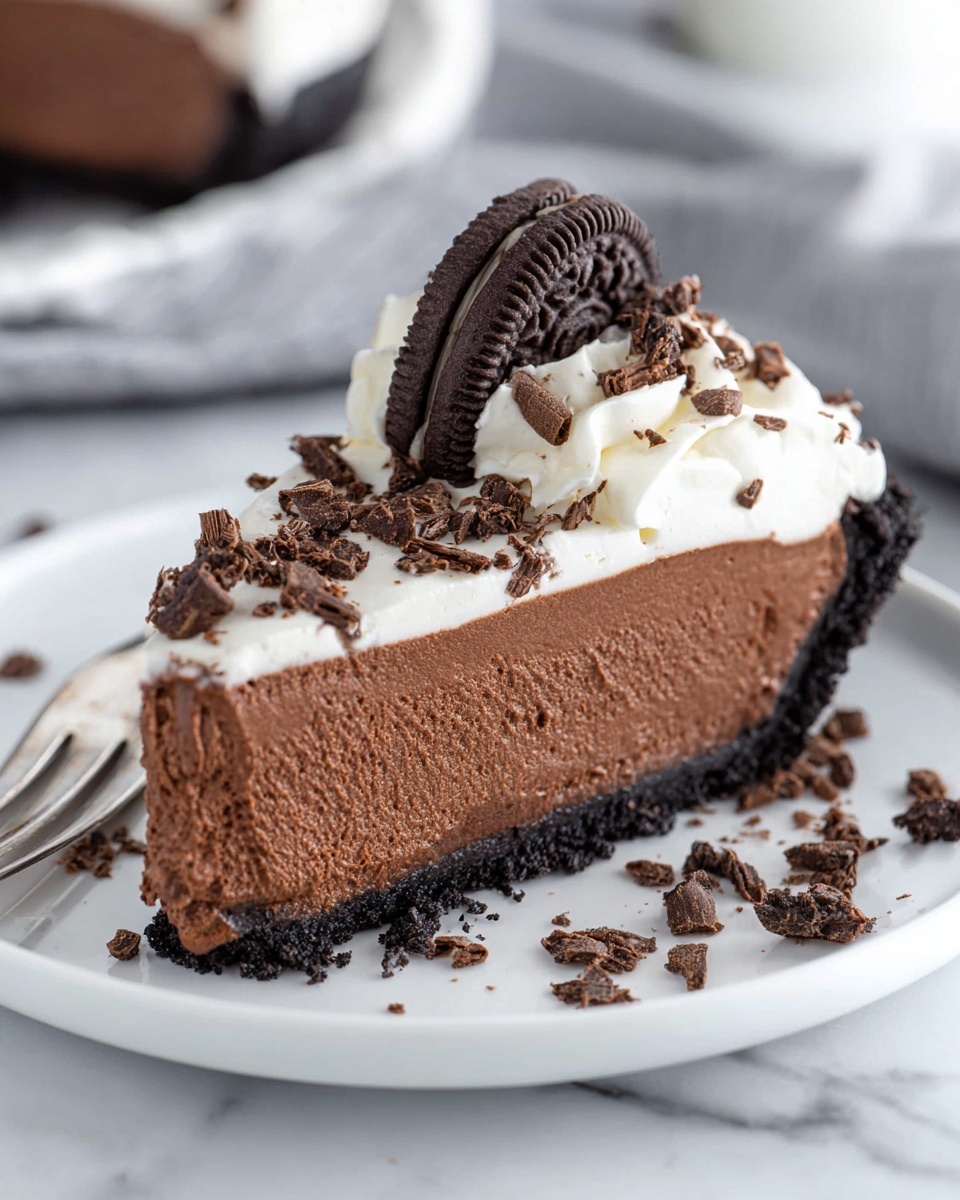
I love serving this cake chilled, right out of the fridge, because the mousse holds its airy yet firm texture best that way. To make the experience even more special, I like to plate each slice with a drizzle of fresh raspberry sauce or a sprinkle of crushed toasted nuts to add brightness and a little crunch contrast. A few fresh berries on the side always elevate the presentation and balance the rich chocolate perfectly.
When it comes to drinks, I find a glass of full-bodied red wine like a Cabernet Sauvignon or a bold Zinfandel pairs beautifully to complement the intense chocolate flavors. For non-alcoholic options, a rich, dark coffee or a creamy vanilla chai latte works wonderfully alongside this dessert to round out the flavors and leave you feeling cozy and satisfied.
This cake really shines at special gatherings—whether it's a holiday celebration, a birthday party, or just a weekend treat. I like to serve it plated on pretty dessert dishes with some fresh mint leaves or edible flowers for an extra touch of elegance. Because the mousse is so rich, I usually offer modest portion sizes to make sure everyone can enjoy a bite without feeling too full.
Variations
One of my favorite things about this Chocolate Mousse Cake Recipe is how easily you can customize it. If you want to add a fruity twist, try folding in some fresh raspberries or cherries into the mousse before chilling. They add bursts of tartness that I find absolutely delightful alongside the chocolate's richness. For a flavor variation, swapping semisweet chocolate for dark chocolate will give the cake a more intense, slightly bitter edge that chocolate purists adore.
For anyone with dietary preferences, this cake can be adapted in various ways. Using gluten-free Oreo cookies makes it suitable for gluten-sensitive eaters without sacrificing any flavor or texture. To make a vegan version, I recommend swapping the cream with coconut cream and finding a dairy-free chocolate option—though be aware the whipped texture may vary slightly. I’ve experimented with aquafaba (the liquid from canned chickpeas) as a vegan mousse base with surprising success!
You can also experiment with different crusts, such as ground almonds mixed with coconut oil for a naturally gluten-free and nutty alternative, or even a graham cracker crust for a more traditional base. Each variation brings a new personality to the cake while keeping that irresistible mousse center at heart.
Storage and Reheating
Storing Leftovers
After enjoying your delicious cake, I recommend storing any leftovers in an airtight container or tightly covering the springform pan with plastic wrap. Keeping it refrigerated is essential since the mousse contains cream and chocolate ganache. Properly stored, the cake will stay fresh and flavorful for up to 3 days, though it’s almost always gone before then in my house!
Freezing
This cake freezes quite well if you want to prepare in advance. To freeze, wrap the cake tightly in multiple layers of plastic wrap and then place it in a freezer-safe container or bag to protect it from freezer burn. It can be frozen for up to one month. When you’re ready to enjoy, thaw it overnight in the refrigerator to allow the mousse to regain its creamy texture. I find freezing can slightly firm up the mousse, so let it soften a bit before slicing.
Reheating
This dessert is best served cold, so reheating isn’t recommended as it will cause the mousse to lose its delicate texture and may separate. Instead, just take it out of the fridge a few minutes before serving to take the chill edge off. This way, the flavors open up nicely without compromising the smooth richness that makes this cake so special.
FAQs
Can I use milk chocolate instead of semisweet chocolate?
You can substitute milk chocolate if you prefer a sweeter, creamier flavor. Just be aware that it may result in a less intense chocolate taste and a softer mousse texture. Adjust the sweetness in the whipped cream accordingly to maintain balance.
Is it necessary to use a springform pan for this recipe?
While not absolutely required, a springform pan makes it much easier to remove the cake without damaging its delicate edges. If you don’t have one, you can use a regular cake pan lined with parchment paper for easier removal, but be gentle when unmolding.
Can I prepare this cake ahead of time?
Definitely! In fact, I recommend making it a day in advance because the mousse needs several hours to set properly. Preparing it early also allows the flavors to meld beautifully, making it even more delicious when served.
How do I prevent the whipped cream from deflating when folding with the chocolate?
The key is to let the chocolate mixture cool until it's just cool to the touch but still fluid before folding it into the whipped cream. Use gentle folding motions with a spatula to keep as much air in the mousse as possible, which helps maintain that light, airy texture.
Can I decorate the cake with other toppings?
Absolutely! Feel free to get creative with toppings like fresh berries, chopped nuts, shaved white chocolate, or even edible gold leaf for an extra touch of elegance. I love switching up the decoration based on the season or occasion.
Conclusion
I truly hope you give this Chocolate Mousse Cake Recipe a try because it’s one of those desserts that never fails to impress and delight. Whether you’re treating yourself or sharing with friends, it’s a beautiful balance of creamy, crunchy, and deeply chocolatey that feels like a little bite of heaven. I can’t wait to hear how much you love it as much as I do!
PrintChocolate Mousse Cake Recipe

Chocolate Mousse Cake is a rich and decadent no-bake dessert that features a crunchy Oreo cookie crust topped with a smooth and airy chocolate mousse filling. Perfect for chocolate lovers, this elegant cake is easy to prepare and ideal for special occasions or celebrations. The luscious mousse is made by folding melted semisweet chocolate ganache into softly whipped cream and is garnished with whipped cream borders, Oreo cookies, and chocolate shavings for a stunning presentation.
- Prep Time: 30 minutes
- Cook Time: 0 minutes
- Total Time: 6 hours 30 minutes
- Yield: 12 servings
- Category: Dessert
- Method: No-Cook
- Cuisine: American
Ingredients
For the Oreo Crust
- 25 Oreo cookies, finely crushed
- 5 tablespoons unsalted butter, melted
For the Chocolate Mousse Filling
- 8 ounces semisweet chocolate, chopped (about 1 ½ cups)
- 1 teaspoon vanilla extract
- 1 pinch of salt
- 2 ¼ cups heavy cream, divided
For the Decoration
- ¾ cup heavy cream
- 2 tablespoons granulated sugar
- 3 Oreo cookies, cut in half
- ⅓ cup chocolate shavings
Instructions
- Prepare the Pan and Crust: Grease a 9-inch springform pan with butter. Combine the finely crushed Oreo cookies and melted butter in a bowl. Press the mixture firmly into the bottom of the pan using a flat measuring cup to create an even, compact crust. Chill the pan in the refrigerator for 30 minutes to set.
- Make the Chocolate Ganache: In a medium bowl, combine the chopped semisweet chocolate, vanilla extract, and a pinch of salt. Heat ¾ cup of heavy cream in a small saucepan over medium heat until it reaches a bare simmer. Pour the hot cream over the chocolate mixture, cover, and let it sit for 1 minute to melt. Then whisk the mixture until smooth and glossy. Cover and refrigerate the ganache for about 20 minutes until cooled but not fully set.
- Whip the Cream for Mousse: In a medium bowl, beat 1 ½ cups of heavy cream with a hand mixer or stand mixer on medium-high speed until soft peaks form, approximately 2 minutes.
- Combine Chocolate and Cream: Whisk the cooled chocolate ganache to loosen it, then gently fold it into the whipped cream using a silicone spatula until smooth and no streaks remain. This creates the chocolate mousse filling.
- Assemble the Cake: Pour the chocolate mousse over the chilled Oreo crust and gently spread it evenly to the edges of the pan. Cover the pan and refrigerate for at least 6 hours or overnight to set completely.
- Prepare the Decorative Whipped Cream: Just before serving, beat the remaining ¾ cup heavy cream and 2 tablespoons granulated sugar with a mixer until stiff peaks form.
- Decorate the Cake: Pipe the whipped cream along the borders of the cake using a large open star tip. Garnish the top of the cake with Oreo cookie halves and chocolate shavings for an elegant finish. Keep the cake refrigerated until serving.
Notes
- This cake must be kept refrigerated at all times to maintain its structure and freshness.
- Use a springform pan to make it easier to remove and serve the cake without damaging the mousse.
- For a richer flavor, use high-quality semisweet chocolate with at least 60% cocoa content.
- Allow sufficient chilling time for the ganache and mousse to set properly for the best texture.
- You can prepare the cake up to a day in advance, making it ideal for parties and special occasions.
- Be gentle when folding the chocolate into whipped cream to maintain the airy texture of the mousse.


Leave a Reply